Quick Start
Tutorial Video
Watch our tutorial to get started with HumaLab SDK:
Get up and running with HumaLab SDK in just a few minutes.
Installation
Install HumaLab SDK using pip:
pip install humalabAuthentication
Before using HumaLab, configure your authentication:
Configure with login()
import humalab as hl

# Configure once
hl.login(api_key="your_api_key", host="https://api.humalab.ai")

# Then use init without credentials
with hl.init(project="my_project", scenario={...}) as run:
    pass
You can get your API key from the HumaLab platform dashboard.
Your First Run
Here's a complete example to run your first validation experiment:
import humalab as hl
from humalab.humalab_api_client import EpisodeStatus

# Initialize and create a run with context manager
with hl.init(
    project="physics_sim",
    name="wind_gravity_test",
    description="Testing different physics parameters",
    tags=["physics", "simulation"],
    scenario={
        "gravity": "${uniform: -10, -9}",
        "friction": "${gaussian: 0.5, 0.1}",
        "wind_speed": "${uniform: 0, 5}"
    },
) as run:
    # Execute episodes
    for i in range(10):
        with run.create_episode() as episode:
            # Access sampled parameters directly
            print(f"Episode {i}:")
            print(f"  Gravity: {episode.gravity}")
            print(f"  Friction: {episode.friction}")
            print(f"  Wind: {episode.wind_speed}")

            # Run your validation logic here
            # result = run_simulation(
            #     gravity=episode.gravity,
            #     friction=episode.friction,
            #     wind_speed=episode.wind_speed
            # )

            # Log the results
            episode.log({
                "success": result.success,
                "final_distance": result.distance,
                "simulation_time": result.time
            })

print("Experiment complete! Check the HumaLab platform to view results.")
Key Concepts Explained
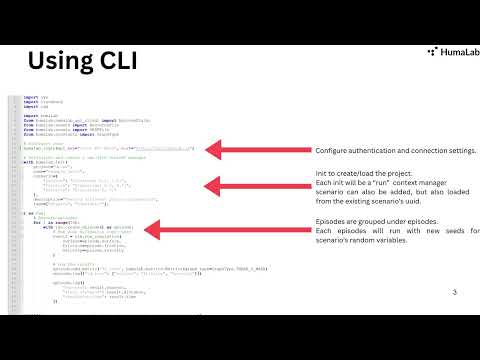
1. Scenarios
Scenarios define the parameter space using probability distributions:
scenario = {
    "parameter1": "${uniform: 0, 10}",      # Uniform from 0 to 10
    "parameter2": "${gaussian: 5, 0.01}",   # Gaussian with mean=5, std=0.01
    "parameter3": "${bernoulli: 0.7}"       # 70% chance of 1, 30% of 0
}
2. Runs
Runs organize your experiments:
run = hl.Run(
    scenario=scenario,
    project="my_project",       # Organize by project
    name="experiment_1",         # Name this specific run
    tags=["baseline", "test"]   # Add searchable tags
)
3. Episodes
Each episode is one execution with specific sampled parameters:
with run.create_episode() as episode:
    # Access sampled parameters directly
    value = episode.my_param

    # Or via scenario property
    config = episode.scenario

    # Log results
    episode.log(results)
Adding Metrics
Track metrics across episodes:
# Create a metric
from humalab.constants import GraphType

metric = hl.metrics.Metrics(
    graph_type=GraphType.LINE
)

# Add to run
run.add_metric("success_rate", metric)

# Log across episodes
successes = 0
with run:
    for i in range(100):
        with run.create_episode() as episode:
            result = validate(episode)
            if result.success:
                successes += 1

            # Log cumulative success rate
            run.log({"success_rate": successes / (i + 1)})
Navigating the GUI
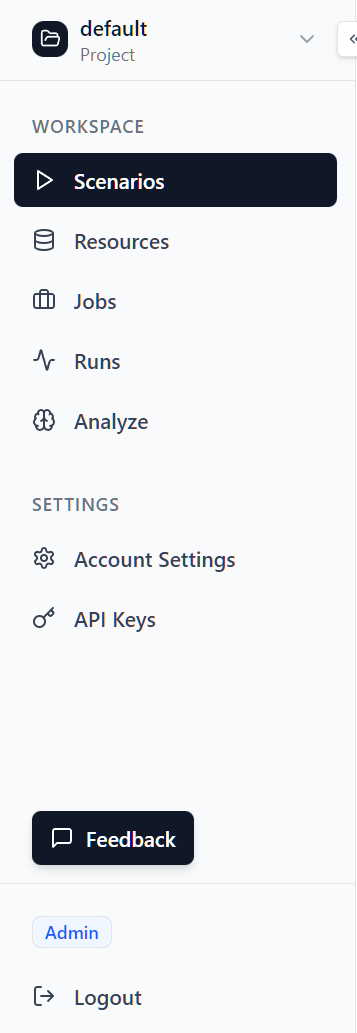
At the first glance, you will see the Navigation panel on the left side to view the currently available features.
Add Resources
Include your assets - URDF, MJCF, Mesh, USD, Image, Video, or any kind of data.
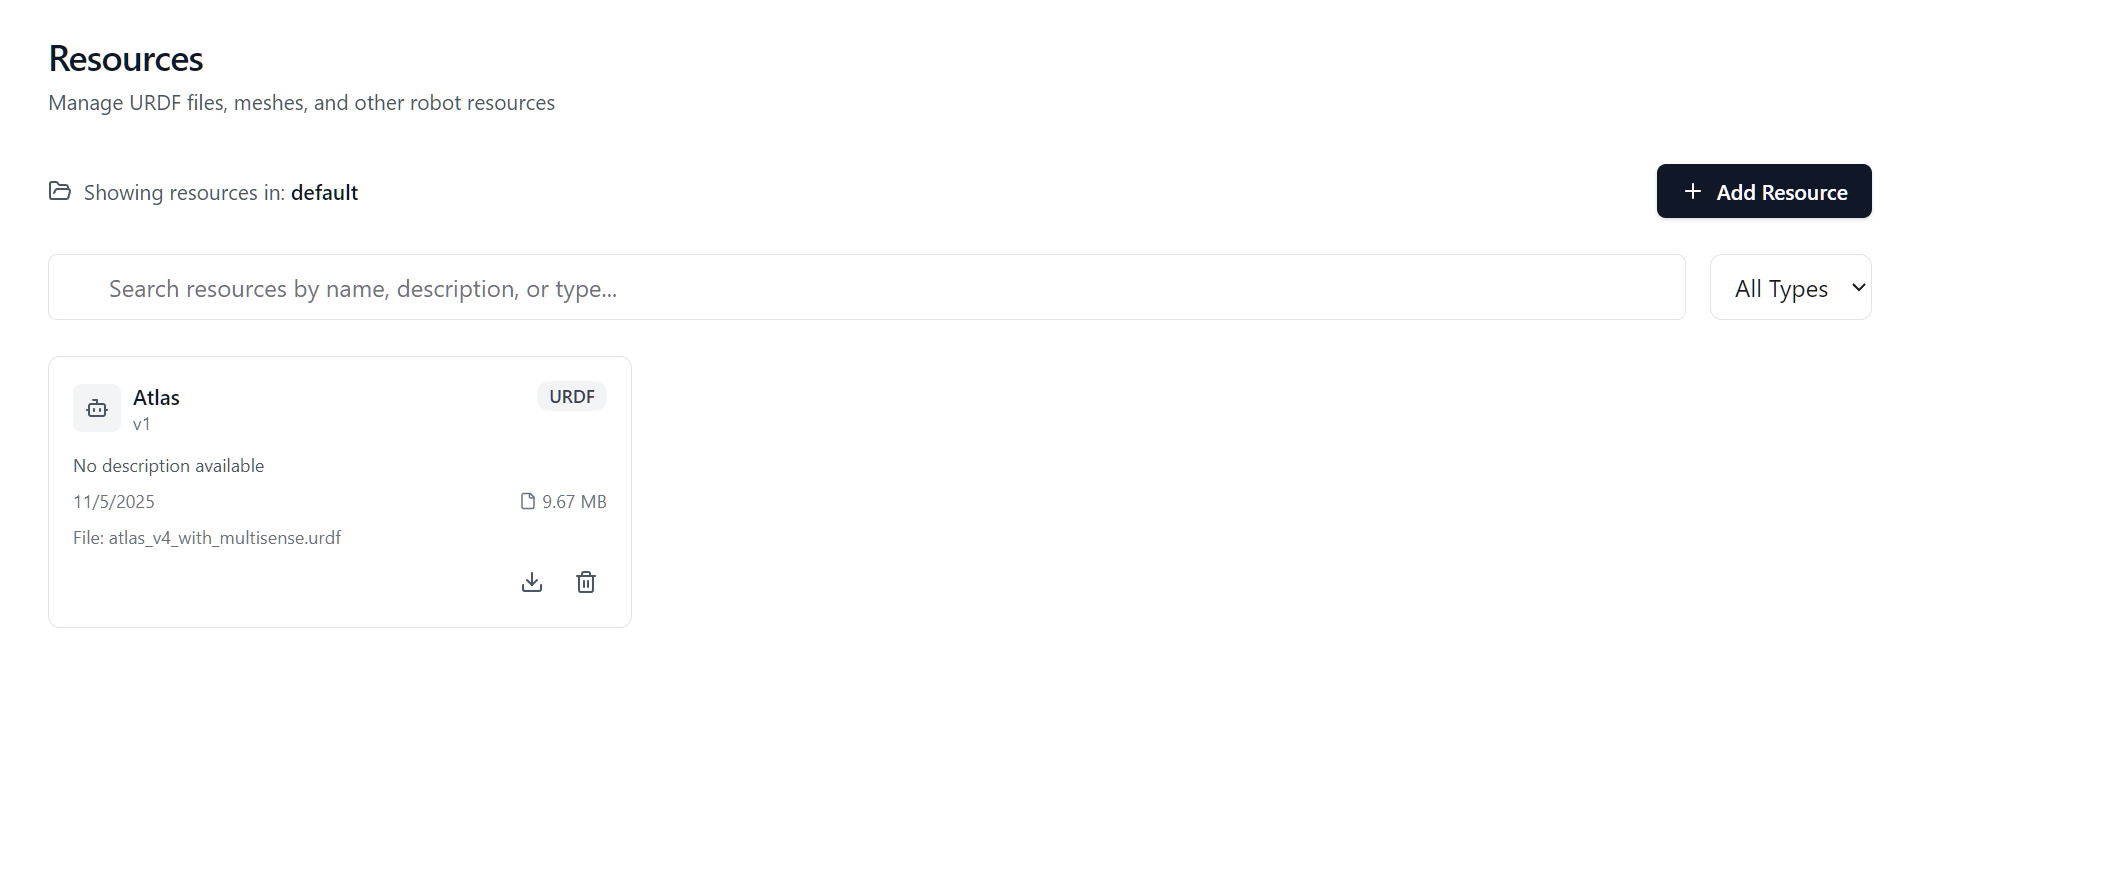
In the Resource manager page, you can view exisitng resources or add a new one.
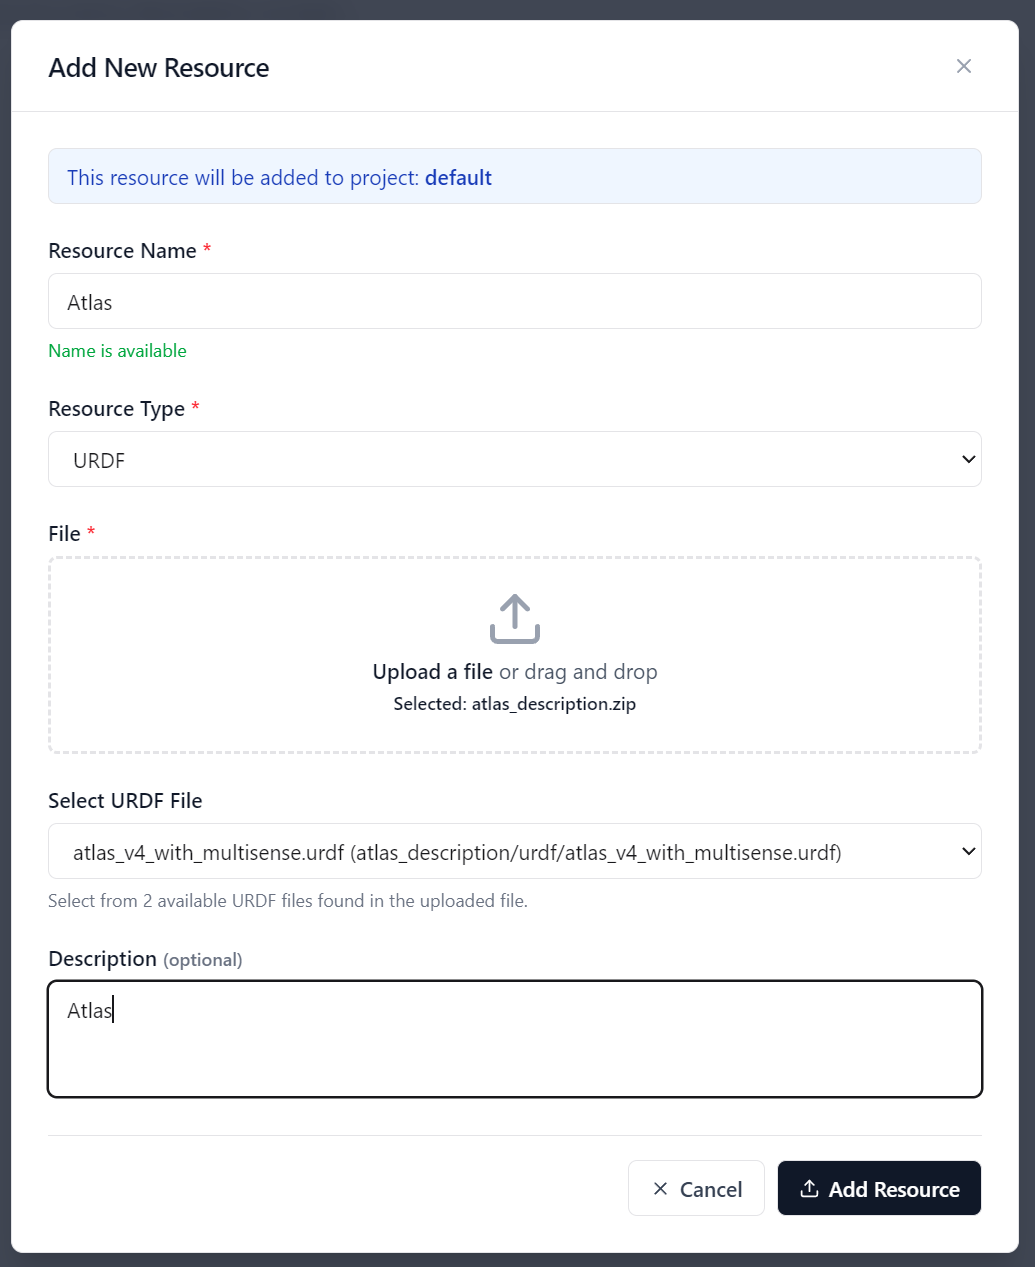
New resources can be added - if it contains multiple files, compress it to zip. The main file will be automatically detected. If there are more than one main file you can choose.
Complete Working Example
Here's a self-contained example you can run:
import humalab as hl
import random

def simulate_robot_task(speed, precision):
    """Simulate a robot task with given parameters"""
    # Higher speed and precision = higher success chance
    success_prob = (speed * 0.4 + precision * 0.6) / 10
    success = random.random() < success_prob

    # Calculate task time (inverse of speed)
    time_taken = 10 / max(speed, 0.1)

    return {
        "success": success,
        "time": time_taken,
        "score": success_prob * 100
    }

# Initialize and run experiment with context manager
total_success = 0

with hl.init(
    project="robotics",
    name="speed_precision_test",
    tags=["robot", "test"],
    scenario={
        "robot_speed": "${uniform: 1, 10}",
        "precision": "${gaussian: 5, 0.02}"
    },
    api_key="your_api_key"
) as run:
    # Add metrics to track
    success_metric = hl.metrics.Metrics()
    run.add_metric("success_rate", success_metric)

    # Execute experiment
    for i in range(50):
        with run.create_episode() as episode:
            # Run simulation with sampled parameters
            # result = simulate_robot_task(
            #     speed=episode.robot_speed,
            #     precision=episode.precision
            # )

            # Log episode results
            episode.log(result)

            # Update run metrics
            if result["success"]:
                total_success += 1

            run.log({
                "success_rate": total_success / (i + 1)
            })

print(f"Experiment complete! Success rate: {total_success/50:.1%}")
Next Steps
Now that you've run your first experiment:
- Learn more about Scenarios - Explore all available distributions
- Understand Runs & Episodes - Master the experiment lifecycle
- Track Metrics - Learn advanced metric tracking
- Browse API Reference - Detailed API documentation
Troubleshooting
Authentication Issues
If you get authentication errors:
# Make sure you've called init or login
hl.init(api_key="your_api_key")

# Or use interactive login
hl.login()
Import Errors
Make sure HumaLab is installed:
pip install --upgrade humalabGetting Help
- GitHub Issues: github.com/humalab/humalab_sdk
- Email: info@humalab.ai
- Documentation: This site!